This trick prevents you from using a poorly functioning Wi-Fi network

When connecting your computer to the network, you may find that it is not using the network as it should. You may connect to another one that works worse, that has less power or speed. This can even happen at home, if you use a repeater. We are going to tell you a trick to prevent this from happening and to always be able to connect to the network that interests you, in order to get a better network speed and quality.
If you do not you connect to the best network possible, that can translate into loss of speed and poor quality. It can cause interruptions when watching high-quality streaming videos, very high latency when playing online, or very slow Internet downloads. If you have several networks available, switching to a better one may be the solution.
Connect to the best Wi-Fi
The goal is for you to connect to the best network available. You will have several options. Be careful because having more coverage does not always mean that it is better. Therefore, you may be interested in manually selecting which network your computer should connect to. Generally, this is interesting if you are always going to connect from the same place and are not going to move around the house.
To do this, it is as simple as clicking on the Wi-Fi icon, which appears in the toolbar, next to the Windows clock. All the available networks will appear there and you have to select the one you are interested in and click the button. Connect automatically. From that moment on, when that network is available, the computer will connect to it and not to others.
But what if you want to always be connected to the strongest Wi-Fi, the one with the most coverage? This can be interesting if you are going to move around your home and there are several repeaters. It is very simple and we are going to tell you how to do it. In this case, you have to follow these steps that we show you below:
- You enter the Control Panel, Networks and Internet and Network Connections
- Right click on Wi-Fi and access Properties
- Clients for Microsoft Networks and Configure
- Advanced Options, Roaming Aggressiveness
- You display the menu on the right and set the Maximum value
This would be the first step, but you also have to configure it to constantly search for the strongest network to connect. This time, you have to perform the following steps to change this value:
- Right click on the Wi-Fi adapter and click on Status
- Wireless properties
- Scan for other wireless networks while connected to this network
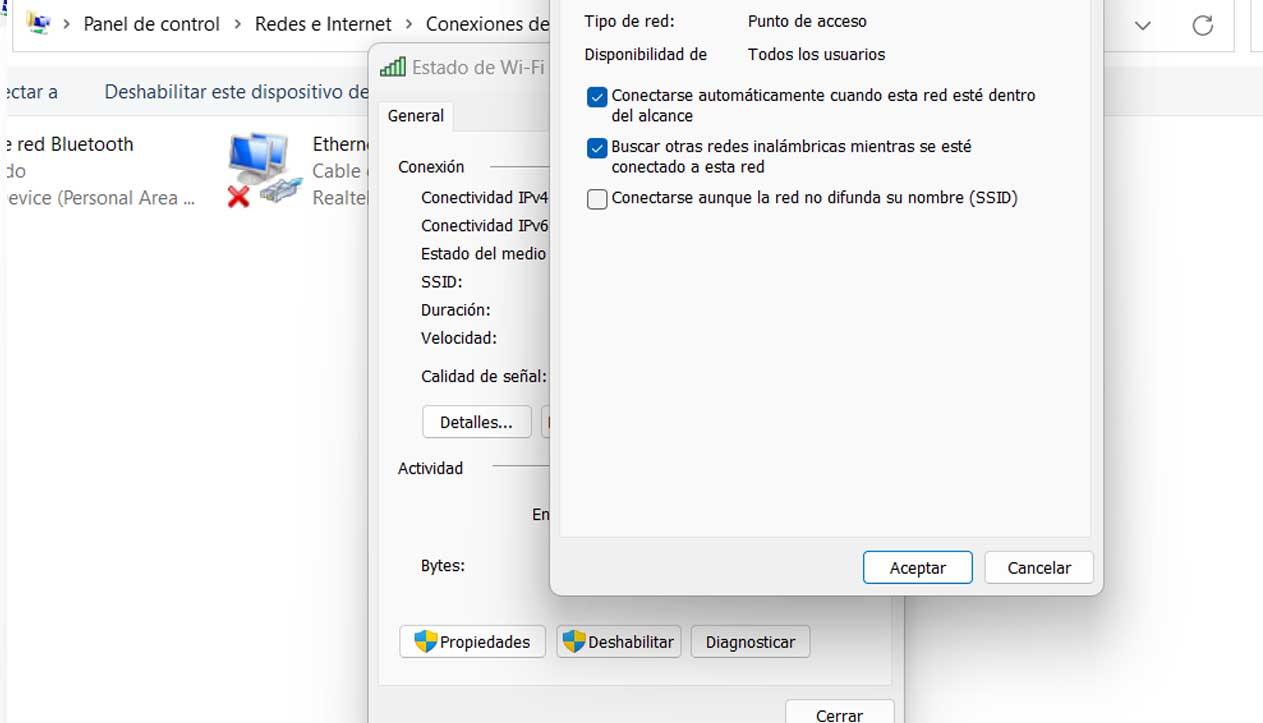
With this, it will continue searching for networks, even if you are connected to one and so you can change to a more powerful one. You will already have the Roaming Aggressiveness option checked at maximum and also have it continue searching for networks. The objective is that you can always access the one that offers greater speed and power, to avoid cuts and problems that may arise. You can always try to improve Wi-Fi speed in Windows.